Single Sign-On (SSO)
Technical workflow for SSO with Tokeny applications
The use case of the SSO is:
-
Investor creates account on your website
-
Investor can access the Tokeny investor platform and/or its endpoints with the same account without having to recreate an account on Tokeny's side
Purpose of this document
This document explains the endpoints to call in order to make SSO work between your application and the Tokeny ecosystem.
Tokeny supports all the providers compatible with the OpenID Connect (OIDC) standard. Tokeny also supports tighter integration with Cognito (AWS).
Principle and implementation
Tokeny manages a service called “Token Trader” (TT), allowing you to trade an authentication token from your Identity Provider (IdP) for a Tokeny Authentication Token (TAT).
To be able to use the TT, you need to have an IdP set up on your side, with whatever authentication means given to your users. Suppose your users are connected under App1, using their IdP access. Following this guide, you will learn how to generate a TAT so they access the Tokeny ecosystem applications.
General technical information
Tokeny uses different environments for sandbox and production. Depending on the environment you’re working on, use one of the following URLs in the next steps:
Token trader:
- Sandbox:
- Production:
In the following document, we will be showcasing the Production URL. If you are configuring the test environment, please modify the base URL in the endpoints presented in this document.
Step 1: Identity provider settings
In order to use the SSO feature from Tokeny TT, you need to send to your Tokeny Implementation Engineer the information for setting up the identity provider.
For example, for Cognito, you need to provide Tokeny:
- The address of the JWKs
- The clientID (optional)
- The client secret (optional)
Once this is done, you will receive a confirmation from your Implementation Engineer and you will be ready to start using the TT.
Step 2: First connection: account creation on Tokeny ecosystem
In order to access the Tokeny ecosystem, you need to create a “shared account” on TT, which will be linked to your own user. To do so, call the following endpoint:
Method: POST
Endpoint: https://api.tokeny.com/token-trader/accounts
Parameters:
- Headers: Authorization: ‘Bearer {IdP token}’
- Body: N/A
Where IdP token is the identity token from your own IdP (IdToken from Cognito, ID Token from OpenID Connect, ...).
Caution: In your IdP token, make sure to leverage:
- All standard OIDC fields in your IdP Bearer
- "Email_verified":true
- "email": "string"
Caution: use the identity token (from your IdP) and not the access token. Access token gives access to a restricted resource whereas identity token holds the identity information of who the holder of the authorization is. That is what Tokeny needs to create the account on Tokeny’s ecosystem.
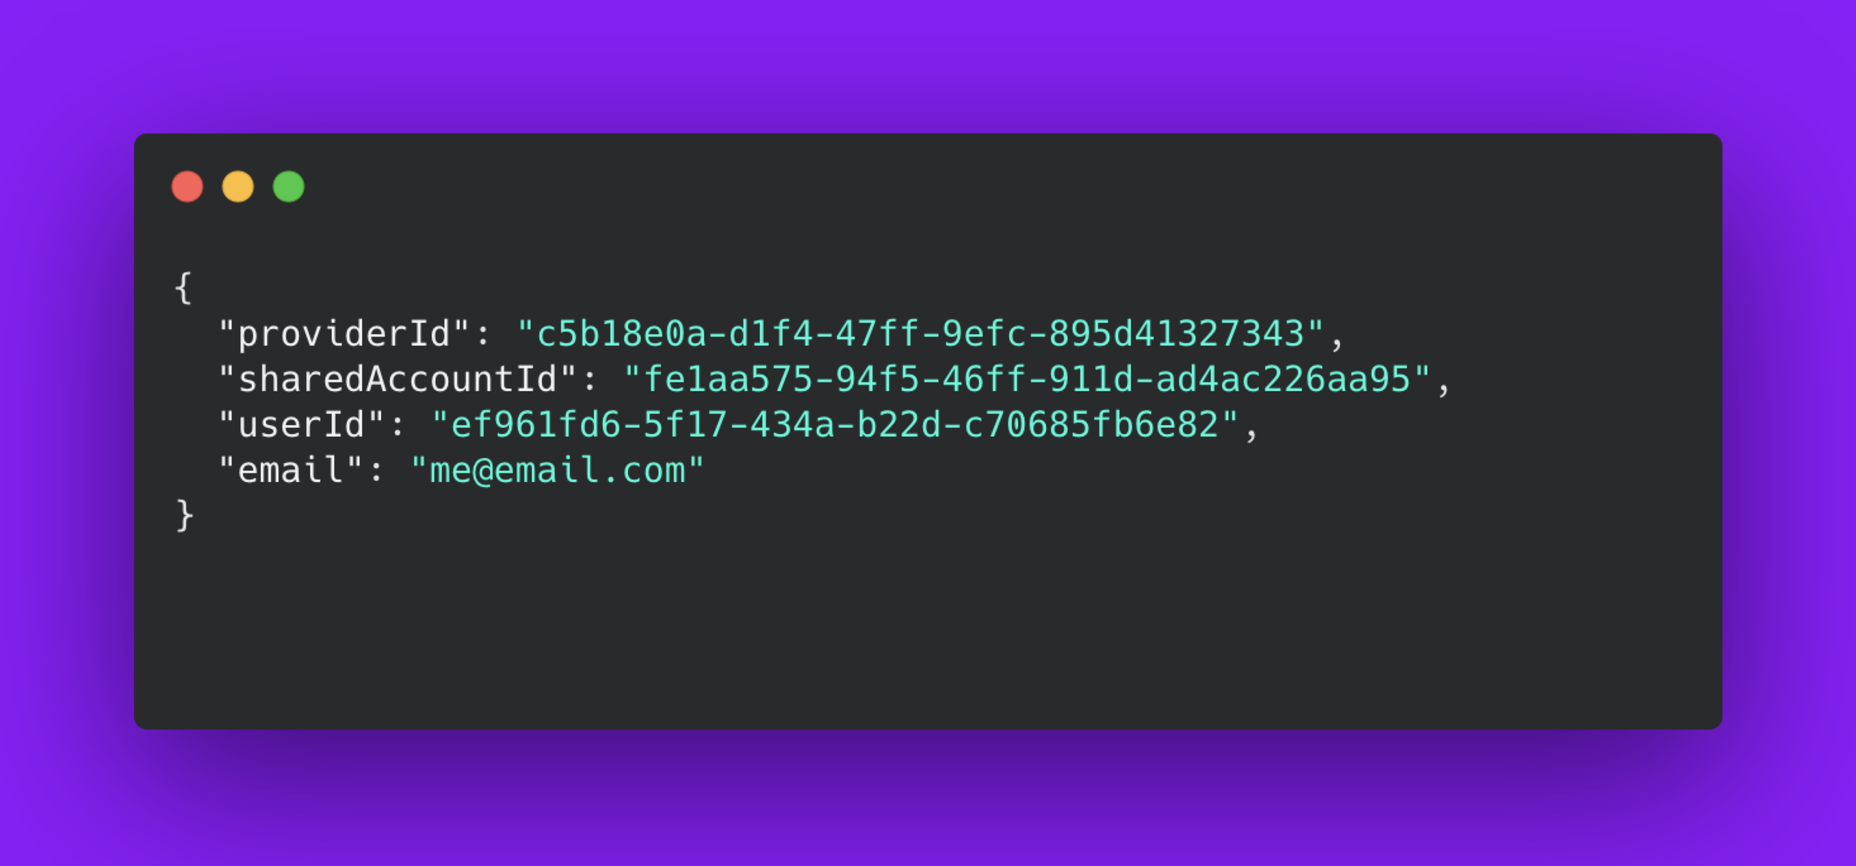
As a response, you will get the following object:

- providerId is the identifier of your IdP in our system
- sharedAccountId is the identifier of the user shared account in our system
- userId is the identifier of the user in your Identity Provider (the content of the sub in your identity token)
- email is the email address of the user in our system
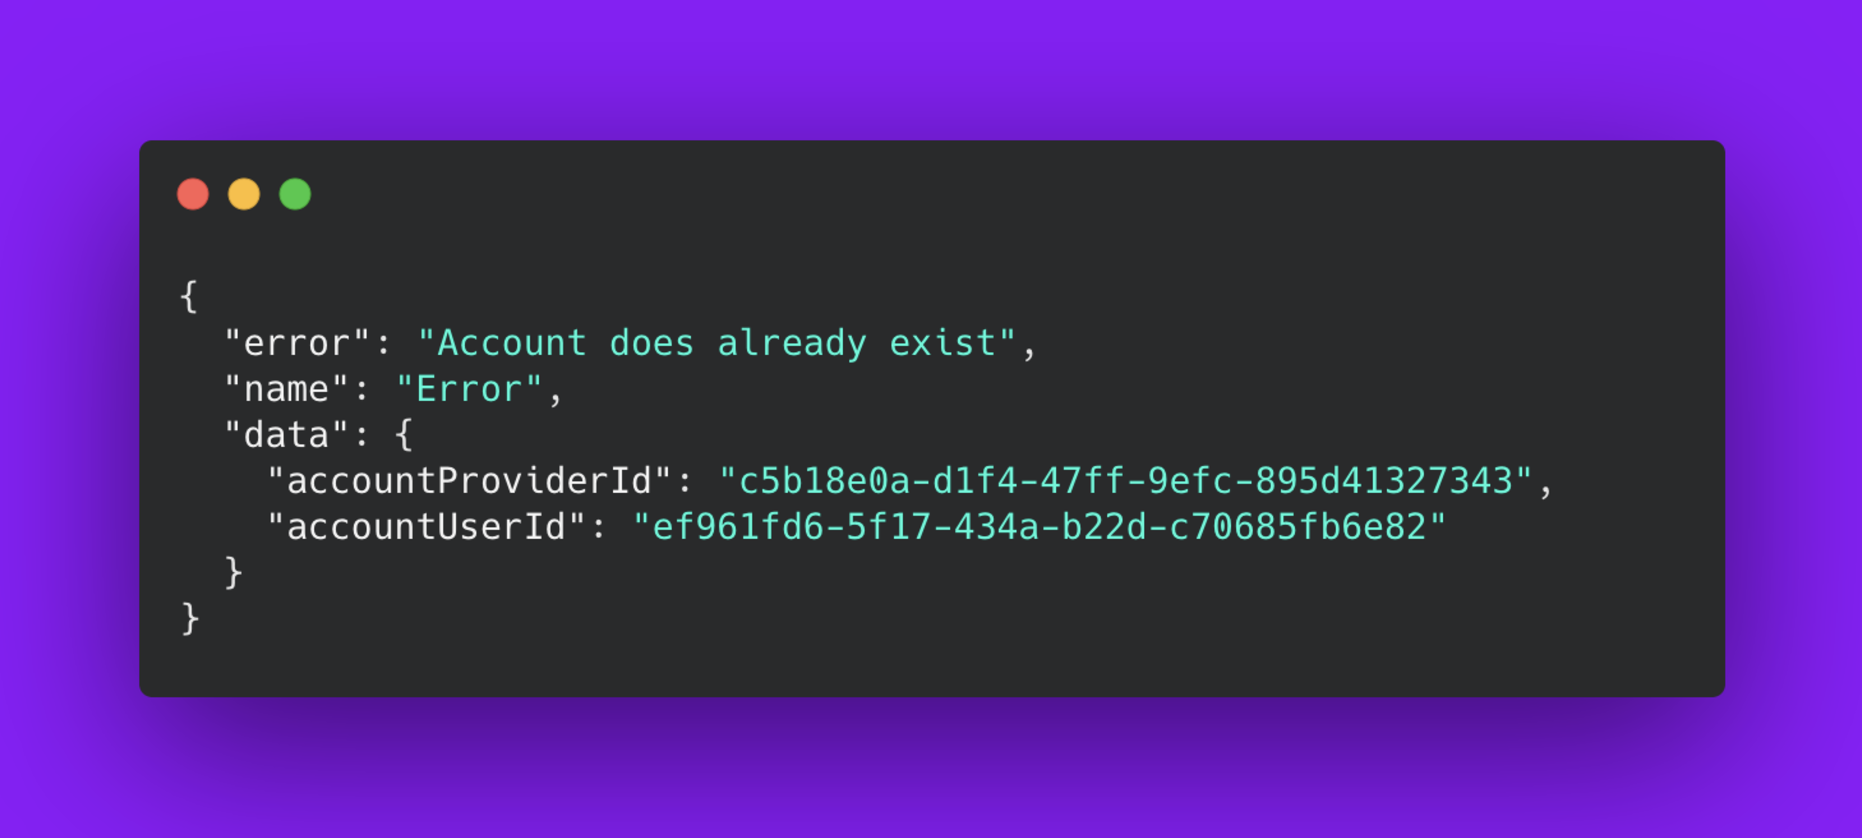
In case the account already exists for this identity and this IdP - even though the identity token is not the same -, you will receive the following response:

With this, you are sure to not recreate the account, and you get the identifiers linked to your user account.
Step 3: Trade the access token for a TAT
Once the account is created on the TT, you need, for each connection, to trade the access token generated by your IdP with a Tokeny Access Token (TAT). To do so, call the following endpoint:
Method: POST
Endpoint: https://api.tokeny.com/token-trader/token
Parameters:
- Headers: Authorization: ‘Bearer {AccessToken token}’
- Body: N/A
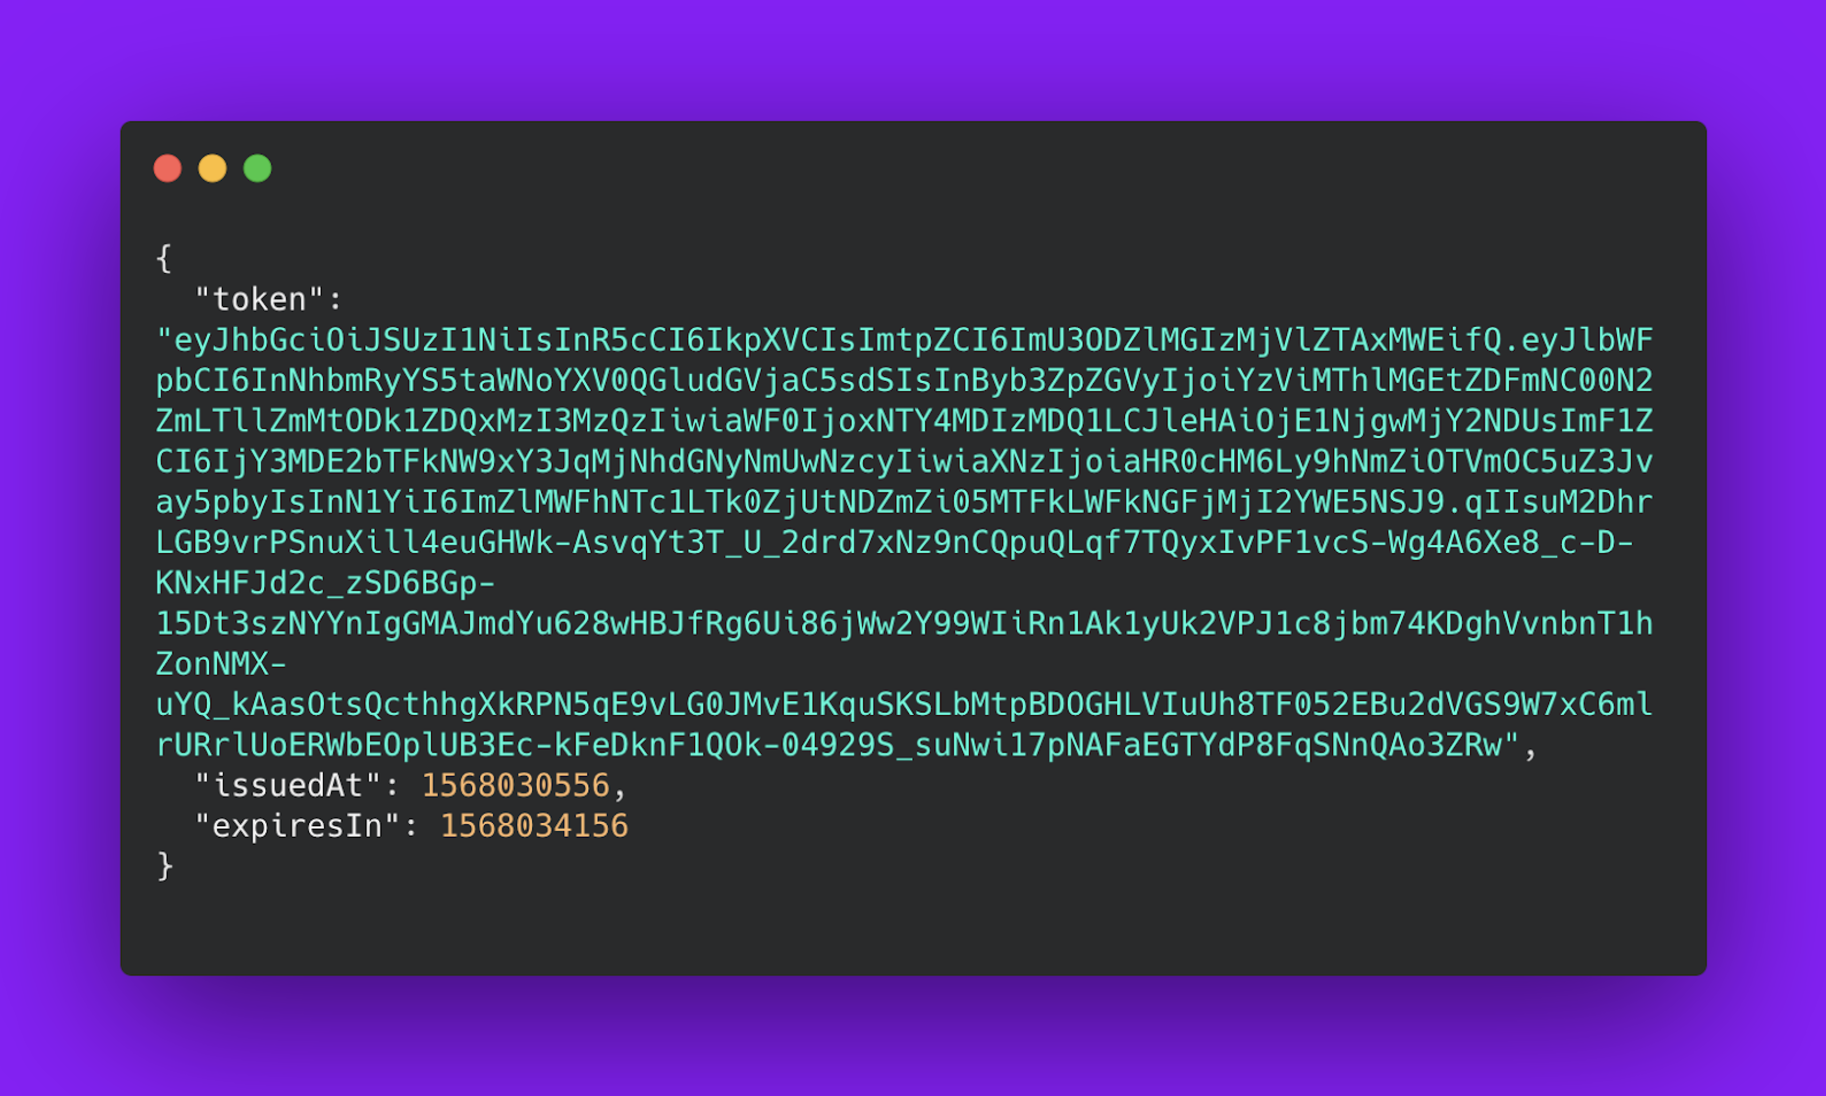
As a response, you will get the following object:

- token is the access token for the Tokeny ecosystem, that you will need to use in the following requests.
Step 4: Create the investor account on Servicing
Each investor must have an account, to create the account simply call the following endpoint:
Documentation: <https://docs.tokeny.com/reference/createaccount>
From there, you are all set to leverage the API from the investor side thanks to the token retrieved at step 3.
Updated 2 months ago
